
Tomato Focaccia: A Loaf for Lazy Days
Updated: 15 hours ago
This tomato focaccia recipe is focaccia at its most relaxed. I've always thought focaccia is the sort of bread that understands the importance of a lazy afternoon.
It doesn't demand elaborate shaping. It doesn't require the precision of a French baguette. And it certainly doesn't expect you to spend half the day attempting to persuade a lump of dough to resemble something you'd find in a Parisian bakery.
Focaccia is much more accommodating. A generous bowl of dough. A little olive oil. Some ripe tomatoes. And enough time for everything to become something rather lovely.
But don't mistake its relaxed appearance for simplicity. Beneath that golden, olive oil kissed surface lies a fascinating collection of baking processes. The flour develops gluten. The yeast produces gas. The dough stretches and rises. The tomatoes release moisture. And the olive oil helps create that extraordinary contrast between a crisp exterior and a soft, airy crumb.
Understanding these little transformations is what turns a perfectly respectable homemade focaccia into something genuinely magnificent.
TIME About 7 hours, mostly rising | SERVES Makes 12 | LEVEL Easy |
Why You'll Love It
NO KNEADING, NO FOLDING The mixer and a long, slow rise do the work | CRISP OUTSIDE, CLOUD-SOFT INSIDE Olive oil in the pan fries the base golden |
GARDEN TOMATOES AT THEIR BEST Marinated in garlic, oregano and olive oil | A BLANK CANVAS Olives, rosemary, potatoes or anything you love |
Tested in my kitchen · As seen on TODAY and The Tonight Show · Parade magazine's chef for 10 years · About Chef Jon → |
Easy Tomato Focaccia
Makes one 9x13-inch focaccia (about 12 pieces) | Hands-on: 30 minutes | Rise: 5½ to 6 hours | Bake: about 20 minutes
Ingredients
For the Dough
3⅔ cups (470 g) bread flour
¾ teaspoon instant yeast
1 teaspoon sugar
1⅔ cups (375 g) cool room-temperature water
2 teaspoons kosher salt
For the Bowl and Pan
5 tablespoons extra-virgin olive oil (2 for the bowl, 3 for the pan)
Cooking spray
For the Tomato Topping
1 pound cherry tomatoes, halved
4 tablespoons extra-virgin olive oil
2 teaspoons dried oregano, plus a pinch to finish
4 garlic cloves, thinly sliced
1½ teaspoons kosher salt
¾ teaspoon freshly ground black pepper
A splash of balsamic vinegar (optional)
A handful of briny black olives (optional)
Flaky sea salt, to finish
Instructions
STEP 1 OF 6
Mix the Dough
In the bowl of a stand mixer fitted with the dough hook, combine the flour, yeast and sugar. With the mixer on low, slowly pour in the water. Once it comes together, increase to medium and mix for 5 minutes.
Cover loosely and rest for 10 minutes, then add the salt and mix on medium for another 5 minutes. The dough will be very soft and loose. That’s what you want.
You'll know it's right when the dough is soft, loose and sticky, and looks almost too wet to work with. |
If something's off: if you're tempted to add flour to tame the sticky dough, don't. It makes a tighter, drier crumb. Oil your hands instead. |
STEP 2 OF 6
The Long, Slow Rise
Pour 2 tablespoons of the olive oil into a large bowl. Ease the dough in with a rubber spatula and dab a little of the oil over the top.
Cover tightly and let rise at room temperature for 5½ to 6 hours, until roughly tripled and full of bubbles.
You'll know it's right when the dough has roughly tripled in size and is full of bubbles. |
STEP 3 OF 6
Marinate the Tomatoes
While the dough rises, whisk the 4 tablespoons olive oil with the oregano, salt, pepper and balsamic (if using) in a large bowl. Add the garlic and tomatoes and gently crush the tomatoes with your hands to release some juice.
Leave to marinate at room temperature for a few hours.
STEP 4 OF 6
Shape in the Pan
Preheat the oven to 500°F (260°C), with a baking steel or stone on the middle rack if you have one.
Mist a 9x13-inch pan with cooking spray and pour in the remaining 3 tablespoons olive oil. Ease the dough into the pan and gently nudge it toward the edges; no need to force it.
Rest, uncovered, for 20 minutes, then oil your fingertips and press dimples all over the dough.
You'll know it's right when the dough has relaxed toward the corners of the pan and your oiled fingertips leave deep dimples all over it. |
STEP 5 OF 6
Top and Bake
Spoon the tomatoes and garlic over the dough, leaving most of the juices behind so the bread doesn’t turn soggy. Scatter with olives, if using, drizzle with a little of the marinade oil, and finish with a pinch of oregano, a few grinds of pepper and flaky salt.
Bake for about 20 minutes, until deep golden and pulling away from the sides of the pan.
You'll know it's right when the top is deep golden and the bread is pulling away from the sides of the pan. |
STEP 6 OF 6
Cool and Serve
Cool in the pan for 5 minutes, then lift onto a wire rack and cool for 30 minutes more.
Cut with a serrated knife, or better still, tear it with your hands.
Chef Jon's tip: Give it the full rest on the rack before you cut in. A short wait keeps the crumb from turning gummy. |
Tips for Success
Don’t Fear the Water: This dough is about 80% hydration. It will look too wet to work with, and that’s what gives the silky, open crumb.
Use Good Olive Oil: Something fruity, grassy and peppery, the kind you’d dip your finger into when no one’s watching.
Let It Rise Slowly: A small amount of yeast and a long rise build flavor. Read a book. Water the garden. Let time do the heavy lifting.
Dimple with Your Fingertips: Dimpling is a gentle business. Think “lover,” not “jackhammer.”
Be Generous with Salt: Flaky sea salt sprinkled before baking creates little pops of salinity that make it sing.
Made it? I'd love to see it
Share a photo or ask me a question. I read every one. Enjoyed it? Tap the stars at the bottom of the page to rate it.
The Secret to Tomato Focaccia: When Flour, Water, Olive Oil, and Tomatoes Become Something Extraordinary
It all begins with water.
The First Stage: Why Focaccia Dough Needs So Much Water
If you've never made focaccia before, the dough can come as something of a surprise. It's wet. Rather sticky. And occasionally seems to have more in common with a bowl of porridge than a respectable loaf of bread. This is perfectly normal.
Focaccia is typically made with a relatively high hydration dough. Hydration simply describes the amount of water in relation to the flour. For example, a dough containing 750 grams of water for every 1,000 grams of flour has a hydration of 75 percent. Many focaccia recipes fall somewhere around 70 to 85 percent hydration, although the precise amount varies.
Why so much water? Because water allows the flour proteins to hydrate and form gluten. It also gives the dough the extensibility needed to expand as the yeast produces gas. A well hydrated dough can develop those beautiful irregular air pockets that make focaccia so appealing. The finished bread should be soft and open inside, with a crust that provides just enough resistance when you bite into it.
But there's a small challenge. Wet dough doesn't behave like the firm dough used for some traditional loaves. It clings to your fingers. It spreads. And it can be rather reluctant to cooperate.
My advice? Don't fight it. A little olive oil on your hands makes the dough easier to handle. And remember, focaccia doesn't need to be shaped into a perfect ball. It simply needs to develop enough strength to hold the gas produced during fermentation. Which brings us to gluten.
The Second Stage: How Gluten Creates That Beautiful Airy Crumb
Flour contains proteins, primarily glutenin and gliadin, that contribute to gluten formation when hydrated and mixed. As the dough develops, these proteins form a stretchy network. Think of it as a delicate structure capable of trapping the gas produced by yeast.
Without enough gluten development, the dough struggles to hold those bubbles. The bread may rise poorly or collapse into a dense, disappointing slab.
But here's the interesting part. You don't necessarily need to knead focaccia vigorously for fifteen minutes. Time and gentle handling can do much of the work. In my recipe, a few minutes in the stand mixer and a long, slow rise do the job for you. Many cooks also use a series of stretch and folds: you lift one side of the dough, stretch it gently, and fold it over itself, then turn the bowl and repeat. Either way, the gluten network grows stronger without aggressive kneading.
You'll notice the dough becoming smoother and more elastic. It begins holding together more confidently. And the transformation is rather satisfying. What started as a sticky, shapeless mixture gradually develops structure.
Although I should point out that it will probably remain sticky. Focaccia has no intention of becoming a well behaved dinner roll.
The Third Stage: Why Time Is One of the Most Important Ingredients
Now we come to something that cannot be measured with a spoon. Time.
Yeast is a living microorganism that consumes available sugars in the dough. As it ferments, it produces carbon dioxide and alcohol, along with compounds that contribute to the bread's flavour. The carbon dioxide becomes trapped within the developing gluten network. This is what causes the dough to rise.
But fermentation does more than create bubbles. Enzymes in the flour and yeast activity gradually influence the dough's structure and flavour. A longer, slower fermentation can produce a more complex aroma than a very rapid rise. That's why this recipe uses only a little yeast and gives the dough a long, unhurried rise.
I also enjoy making focaccia with an overnight rest in the refrigerator. The dough develops slowly. The flavour becomes more interesting. And the process fits beautifully into a relaxed day of cooking. You can mix the dough in the evening, refrigerate it overnight, and finish the bread the following day. There's something rather appealing about allowing the refrigerator to do much of the work while you're getting a good night's sleep.
But don't confuse slow fermentation with neglect. The dough still needs enough time to rise properly before baking. If it's cold from the refrigerator, it may require a period at room temperature to become airy and relaxed.
Watch the dough rather than relying entirely on the clock. It should look visibly expanded, with bubbles appearing beneath the surface. And when the pan moves gently, the dough should have a soft, almost trembling quality. That's usually a very encouraging sign.
The Fourth Stage: Why Olive Oil Is So Important
Olive oil is one of the defining ingredients of focaccia. And I don't think this is the moment to be timid with it. A good focaccia should have a generous amount of olive oil. Not enough to create an oil slick across the kitchen. But enough to influence both flavour and texture.
Olive oil plays several roles. Some coats the bowl and the dough as it rises. More is used to coat the baking pan, helping prevent sticking and encouraging the underside of the bread to become beautifully crisp. And then there's the oil on the surface.
As the focaccia bakes, that oil helps conduct heat across the exposed dough and encourages a golden, flavourful crust. It also gathers in the little dimples that make focaccia so recognisable.
I particularly enjoy using a good extra virgin olive oil with a fruity, slightly peppery character. The flavour becomes part of the bread. And when the focaccia comes out of the oven, a final little drizzle can be rather lovely. Although I'd suggest tasting the bread first. Sometimes it already has quite enough.
The Fifth Stage: The Wonderful Business of Dimpling the Dough
Now we arrive at one of my favourite parts of making focaccia. The dimples.
Once the dough has relaxed in its baking pan, you press your fingertips gently into the surface. Those little indentations give focaccia its characteristic appearance. But they're not simply decorative. Dimpling helps redistribute some of the gas within the dough and creates small pockets where olive oil, salt, and other toppings can settle. It also helps prevent the dough from rising into one enormous, uneven dome.
The technique is wonderfully simple. Coat your fingertips lightly with olive oil. Then press down through the dough in a series of gentle movements. You want to create noticeable indentations without aggressively flattening the entire loaf. The dough should remain airy.
And here's something worth remembering. If the dough immediately springs back and refuses to hold the dimples, it may need a little more time to relax. Give it ten or fifteen minutes, then try again. Bread dough can be remarkably stubborn when it hasn't finished resting. A quality I occasionally recognise in myself.
The Sixth Stage: Why Tomatoes Need a Little Attention
Now for the tomatoes. And this is where Tomato Focaccia becomes particularly interesting. Ripe tomatoes contain a great deal of water. Which is wonderful when you're eating them fresh. But rather less helpful when you're trying to bake a loaf of bread with a beautifully crisp crust.
As the tomatoes heat in the oven, their cells soften and some of their moisture escapes. Their flavour becomes more concentrated as water evaporates. The natural sugars and savoury compounds become more noticeable. And the edges may develop a little roasted sweetness.
But if the tomatoes release too much liquid directly into the dough, the surrounding bread can become damp. This is why I prefer to use small, ripe cherry tomatoes. They have a good balance of sweetness, acidity, and flesh. And their size makes them easy to distribute across the surface.
If the tomatoes are particularly juicy, I sometimes halve them and allow them to sit briefly on paper towels. This removes a little excess surface moisture. You don't want to dry them out completely. Their juices are part of what makes Tomato Focaccia so delicious. We're simply trying to avoid turning the top of the bread into a tomato swimming pool.
The Seventh Stage: Why I Like to Marinate the Tomatoes
For Tomato Focaccia, I particularly enjoy giving the tomatoes a little time with olive oil, garlic, herbs, and salt. A few hours while the dough rises is just right, long enough for the flavours to become well acquainted.
The salt begins drawing some moisture from the tomatoes through osmosis. The olive oil coats their surfaces. And the herbs contribute their fragrance. Fresh rosemary is a classic choice. But basil, oregano, and thyme can also be wonderful. I particularly enjoy the combination of ripe tomatoes, olive oil, and a little oregano. It reminds me of those wonderfully simple Italian lunches where the ingredients are so good that nobody feels the need to interfere with them.
One small detail matters. If you're using fresh garlic, avoid leaving large pieces exposed on the surface. Garlic can burn in a hot oven, developing a bitter flavour. Thinly sliced garlic coated in the oil is generally easier to manage, although even then, it's worth keeping an eye on it.
And don't pour every drop of liquid released by the tomatoes onto the dough. Use the fragrant oil, certainly. But leave behind any excessive watery juices. The focaccia will thank you.
The Eighth Stage: How the Oven Creates a Crisp Crust and Soft Interior
Now comes the moment when everything changes. The focaccia enters a hot oven. And within minutes, the dough begins expanding. This initial burst of rising is known as oven spring. The gas already trapped in the dough expands as it warms. Yeast activity may briefly increase before the heat eventually stops fermentation. Meanwhile, moisture within the dough begins turning into steam. Together, these changes contribute to the final expansion of the loaf.
As the temperature continues rising, the starch in the flour gelatinises and the gluten structure sets. The soft dough gradually becomes bread.
And on the surface, something equally interesting is happening. Moisture evaporates. The crust begins drying. And browning reactions create the golden colour and toasted flavours we associate with freshly baked focaccia. The Maillard reaction plays an important role, particularly where proteins and sugars are present. The olive oil encourages a wonderfully crisp surface. And the tomatoes begin roasting, becoming softer and more intensely flavoured.
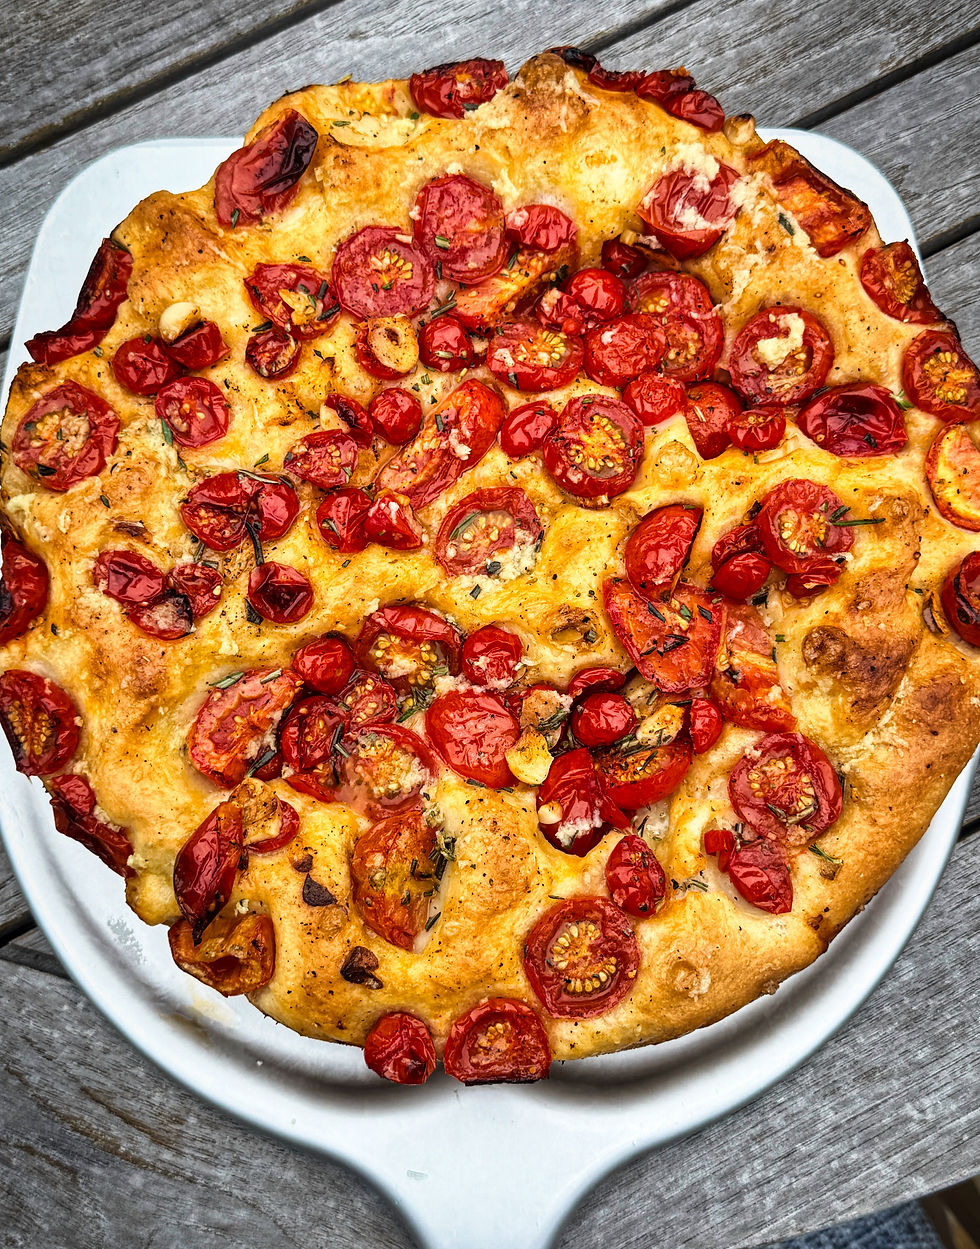
The result is a beautiful contrast. Golden and lightly crisp outside. Soft and airy inside. With little pockets of olive oil and roasted tomato scattered across the top.
The Ninth Stage: Why the Baking Pan Matters
Here's something people don't always consider. The baking pan can make a noticeable difference to the finished focaccia.
A metal pan conducts heat efficiently. That helps the bottom of the dough cook and develop colour. A heavy, dark metal pan may brown the underside more quickly than a pale pan. A glass or ceramic dish behaves differently and may require adjustments to the baking time.
For focaccia, I generally favour a sturdy metal baking pan. And I like to coat it generously with olive oil. As the dough bakes, the oil between the bread and the hot metal helps create that wonderfully crisp underside. It's almost as though the bottom of the focaccia is being gently fried while the rest of the loaf bakes. And I think that's rather magnificent.
But keep an eye on the base. If the underside is becoming too dark before the top is ready, move the pan to a higher oven rack. If the top looks beautiful but the base remains pale, a little more time lower in the oven may help.
Every oven has its own personality. Some are charming. Others require a certain amount of negotiation.
The Tenth Stage: Why Focaccia Needs a Little Rest After Baking
This is perhaps the most difficult part. The focaccia is golden. The tomatoes are soft and fragrant. The olive oil is still shimmering gently across the surface. And the kitchen smells absolutely wonderful. Naturally, you want to cut into it immediately. I understand. I've been there.
But allowing the focaccia to rest briefly makes a difference. As the bread cools, moisture redistributes through the crumb and the structure becomes more stable. Cutting into it immediately can compress the delicate interior, particularly if the loaf is very soft.
I like to give the bread a few minutes in the pan before transferring it to a cooling rack. This is important. If you leave hot focaccia sitting in its pan for too long, steam can collect underneath and soften that beautifully crisp base. And after all the effort we've put into developing the crust, that would be a terrible shame.
Once the bread has cooled enough to handle comfortably, it's ready. Warm focaccia is one of life's great pleasures. And I don't think anyone should be expected to wait until it's completely cold.
How Do You Know When Tomato Focaccia Is Ready?
I look for four things.
First, the surface should be beautifully golden, with a few deeper brown patches around the edges.
Second, the tomatoes should be soft and lightly roasted, their flavour concentrated without becoming burnt.
Third, the underside should be crisp and golden.
And finally, the interior should be soft and airy, with an open crumb and no damp, doughy patches.
If you're unsure, lift one corner carefully with a spatula and inspect the base. A pale underside may need a little more time. A deeply browned top with a pale base suggests the oven heat is reaching the surface more aggressively than the bottom. And if the bread feels unusually heavy or gummy after cooling, it may have been underbaked.
For a lean, well baked focaccia, the centre will often reach approximately 200°F to 205°F (93°C to 96°C), although temperature alone doesn't tell you whether the crust has developed properly. Use your eyes, your hands, and your nose. They're excellent kitchen tools.
A Loaf for Lazy Days
What I love most about Tomato Focaccia is that it doesn't ask you to make a great fuss. It rewards a little planning. A little patience. And the willingness to let good ingredients speak for themselves.
The dough develops slowly. The tomatoes soften. The olive oil creates that glorious crust. And the finished bread emerges from the oven smelling like an Italian summer afternoon.
I love tearing off a piece while it's still slightly warm. Perhaps with a little mozzarella. A few slices of good prosciutto. Or simply a bowl of ripe tomatoes dressed with olive oil and sea salt. But quite often, I don't bother with anything else. A piece of Tomato Focaccia. A comfortable chair. A little sunshine. And absolutely no reason to hurry.
Although I would suggest making a generous loaf. Because I've discovered that focaccia has a rather unfortunate habit of disappearing while everyone insists they've only had a small piece. An interesting phenomenon. And one that appears to become considerably more common when the bread is still warm.
Key Ingredients
Bread Flour: Its extra strength holds all that water and gives the open, airy crumb with just enough chew.
Instant Yeast: Only a small amount is used, so the long, slow rise has time to build flavour.
Water: Cool room-temperature water makes a very wet dough, and that high hydration is what gives the silky, open crumb.
Extra-Virgin Olive Oil: Pooled in the pan it fries the base golden and crisp, and in the marinade it carries the garlic and oregano, so use a fruity, peppery one.
Cherry Tomatoes: Halved, gently crushed and marinated, they collapse in the oven into sweet, jammy little jewels.
Garlic: Thinly sliced and marinated with the tomatoes, it roasts on top of the bread and fills the kitchen with the loveliest scent.
Dried Oregano: It seasons the tomato marinade and gets a final pinch over the top before baking.
Flaky Sea Salt: Scattered on before baking, it gives little pops of salinity that make the whole thing sing.
Pula, Summer: Years Ago, but Still Warm in My Mind
Some days, I rather enjoy lazy cooking. Not the kind born of apathy or empty cupboards, but the kind where the kitchen breathes a little easier. Recipes that truly sing, but haven’t spent hours rehearsing. A good slow cooker stew, a bowl of ricotta stirred with herbs, or (as was the case this morning) a bread that asks only for time and a bit of warmth.
I’d been craving focaccia. The tomatoes in the garden, still glistening with dew, have been arriving in abundance: ripe, plump, and splitting at their seams with joy. Each morning, I pluck a few, still warm from the early sun, and bring them inside like treasure. Today, they demanded to be used. Not in something fussy. Just something honest.
It reminded me of a recipe I learned in Pula, on Croatia’s Istrian coast. A seaside town where the air carries salt and wild fennel, and where even the simplest food tastes of something ancient. I had gone there to rest after a long season of too much everything: too much work, too much noise, not enough self. I remember a stone courtyard with uneven tiles, vines heavy with grapes, and an old woman, wrists dusted with flour, pressing dough into a battered pan. There was no folding. No artisan stretch and slap. Just water, flour, oil, and a kind of reverence for simplicity.
Her focaccia had a higher water content than most, which gave it an airy, almost custard-like softness beneath a golden, crisp top. The olive oil pooled at the bottom of the pan worked its magic, forming a crust that snapped under the teeth, while the inside remained cloud-soft.
That memory followed me home. And so, today, with the garden gently humming with bees and the dog snoozing in a patch of sun, I made a version of that Pula bread. I marinated cherry tomatoes in oregano, garlic, and olive oil, and pressed them into the dough like jewels. The scent, as it baked, was enough to stop me in my tracks: roasted garlic, sweet tomatoes, and the nutty warmth of bread meeting heat.
I stood by the oven and let myself smile for no particular reason. Sometimes joy arrives quietly, wrapped in the smell of something rising.
Think of It as a Canvas, Not a Contract
Please don’t straightjacket this dough. Perhaps you’ll scatter it with olives and rosemary. Or layer it with thin coins of potato and crushed pink peppercorns. Shaved zucchini? A smear of anchovy paste? The dough won’t mind. It welcomes all with open arms.
Common Mistakes to Avoid
Adding flour to the sticky dough: it makes a tighter, drier crumb; oil your hands instead
Being stingy with the oil in the pan: it’s what fries the base golden and crisp
Pouring the tomato juices on top: the bread turns soggy
Cutting it straight from the oven: a short rest keeps the crumb from turning gummy
What to Serve with Tomato Focaccia
Burrata or fresh mozzarella, as in my Peach, Burrata, and Prosciutto Salad
A big bowl of soup or stew, like my Smoky Roasted Tomato Soup
Cured meats, olives and a glass of chilled white wine
How to Store
Room temperature: wrap well and keep for up to 2 days.
Freeze: freeze pieces for up to 1 month.
Reheat: a few minutes in a hot oven brings back the crisp crust.
Frequently Asked Questions
What is Tomato Focaccia?
Tomato Focaccia is an Italian inspired flatbread made with a soft, olive oil enriched dough topped with fresh tomatoes, herbs, and sea salt. It is baked until golden, with a crisp exterior and soft, airy interior.
What are the best tomatoes for focaccia?
Cherry tomatoes and grape tomatoes are excellent choices because of their sweetness, size, and concentrated flavour. Small, ripe tomatoes roast beautifully and distribute evenly across the dough.
Should you cook tomatoes before putting them on focaccia?
No. Fresh tomatoes can be placed directly onto the dough before baking. They soften and roast in the oven. Very juicy tomatoes may benefit from being halved and briefly drained to reduce excess moisture.
Why is my focaccia dense?
Dense focaccia can result from insufficient fermentation, weak gluten development, or dough that has been handled too aggressively after rising. Allow the dough to become visibly airy before baking and avoid pressing out all the trapped gas.
Why is focaccia dough so sticky?
Focaccia is commonly made with a high hydration dough, meaning it contains a relatively large amount of water compared with flour. This one is about 80% hydration, which helps create a soft, open crumb. Lightly oiling your hands makes the dough easier to handle.
Do you need to knead focaccia?
Not necessarily. Many focaccia recipes use gentle stretch and folds or a long fermentation to develop gluten. This recipe uses a few minutes in a stand mixer and a long, slow rise, with no kneading or folding.
Can you make Tomato Focaccia overnight?
Yes. An overnight fermentation in the refrigerator is an excellent way to develop flavour and fit bread making into a relaxed schedule. Cover and refrigerate the dough for 12 to 24 hours, then let it come to room temperature in the pan for 1 to 2 hours before dimpling and baking.
Why do you put dimples in focaccia?
Dimpling helps distribute gas within the dough, creates pockets for olive oil and toppings, and contributes to focaccia's characteristic appearance and texture.
How do you make focaccia crispy on the bottom?
Use a sturdy metal baking pan with a generous coating of olive oil. Bake in a properly preheated oven and allow the base to develop a golden crust. Transfer the bread to a cooling rack after a short rest to prevent trapped steam from softening the underside.
Why is my Tomato Focaccia soggy?
Excess moisture from very juicy tomatoes, insufficient baking, or leaving the bread in its pan too long after baking can cause sogginess. Drain overly wet toppings, bake until the base is golden, and cool the bread on a rack.
Can you freeze Tomato Focaccia?
Yes. Allow the bread to cool completely, wrap it well, and freeze in portions for up to a month. Reheat in the oven to refresh the crust.
How long does homemade Tomato Focaccia stay fresh?
Focaccia is best enjoyed on the day it's baked. Store leftovers wrapped well at room temperature for up to two days, or freeze for longer storage. Reheating briefly in the oven helps restore its texture.
What do you serve with Tomato Focaccia?
Tomato Focaccia is wonderful with fresh mozzarella, burrata, prosciutto, grilled vegetables, soup, or a simple green salad. It also makes an excellent bread for sandwiches.
Can I use all-purpose flour?
Yes. The crumb will be a little softer and less chewy. Hold back a tablespoon or two of the water if the dough feels unmanageable.
Can I make it without a stand mixer?
Yes. Stir with a sturdy spoon for a few minutes, rest, stir in the salt, and let the long rise do the rest.
How do you pronounce focaccia?
foh-KAH-chah.
You Might Also Like
Try my Brown Butter Hummus, Greek Salad, Smoky Roasted Tomato Soup, Pasta alla Vodka, and Risotto Milanese. And if you love baking bread, try my Daily Bread Recipe.
Recommended Equipment
Make this recipe easier with the right tools: Rimmed Baking Sheet, Digital Scale, Bench Scraper, Oven Thermometer. Also useful: Cooling Rack and Serrated Knife.


Comments